https://tensix.com/how-to-create-a-critical-activity-indicator-in-primavera-p6/
Credit to TenSix Consulting
Create a Critical Activity Indicator in the Activity Table
Identifying critical activities in your schedule is paramount in preventing delays that, if left unchecked, can ultimately de-rail your project. Although critical activities are displayed in the Gantt Chart, (typically with red Gantt chart bars) it not always easy keeping an eye on them, especially if you have a complex schedule. Another useful thing you can do in Primavera P6, is to create a Critical Activity Indicator in the activity table left of the Gantt chart.
With the combination of global change and a Critical Activity Indicator, Primavera P6 will provide a graphical display in the activity table, of all the critical activities in your schedule. Once the indicator is inserted in the activity table, it only takes a moment to identify any activities that may be critical.
In this article, we will demonstrate how to create a Critical Activity Indicator, run a Global change and display the activity results with the UDF Indicator in the activity table.
In our demonstration project, below in Figure 1, we can see our critical activities displayed in the Gantt chart.
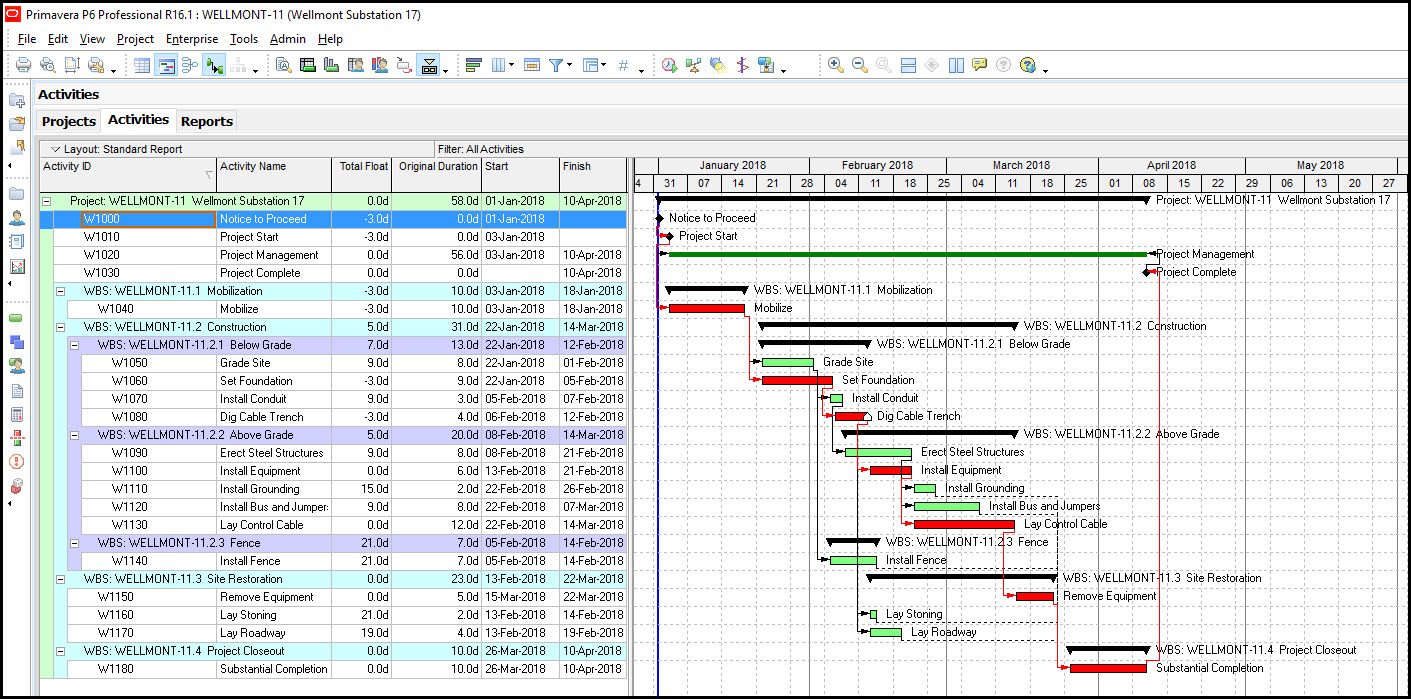 Figure 1
To be able to quickly reference the critical activities within the activity table, we need to create a User Defined Field (UDF). We select ‘Enterprise’ and ‘User Defined Fields’. In the UDA dialog box, we select ‘Critical Indicator’ from the ‘Titles’ field, and from ‘data-type’ we select ‘Indicator’, as shown below in Figure 2.
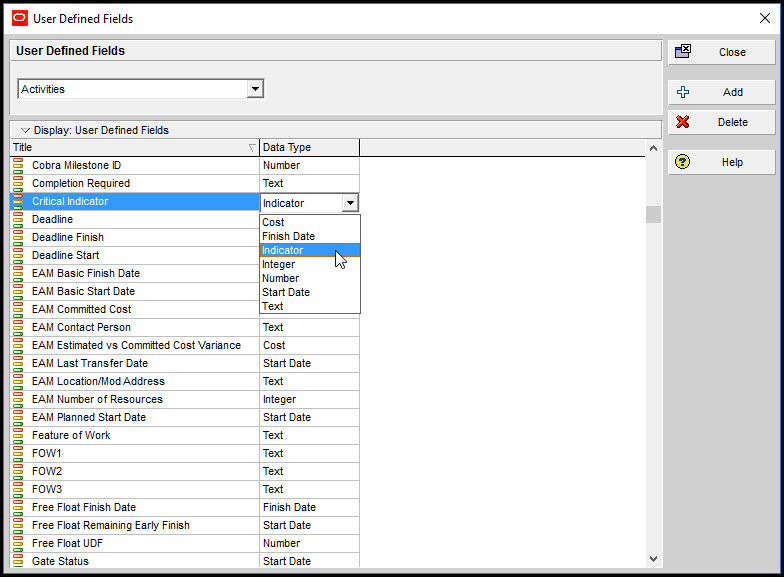 Figure 2
We associate all of our activities with our newly created UDF called ‘Critical Indicator’.
We need to analyze all of our activities to determine whether they are critical by creating a global change routine. We select ‘Tools’ and ‘Global Change’ and in the dialog, we select ‘+ New’.
In the ‘Modify Global Change’ dialog box, in the ‘Select Subject Area’ box at the top left-hand side of the screen we select ‘Activities’ and for the top right-hand side box, ‘Global Change Name’ we type ‘Set Global Indicator’, as shown below in Figure 3.
The equivalency is ‘Where Critical equals Yes’. Primavera P6 will analyze each activity and identify whether it is critical (the UDF indicator will turn red) or non-critical (the UDF indicator will turn green) based upon the parameter settings for the activities.
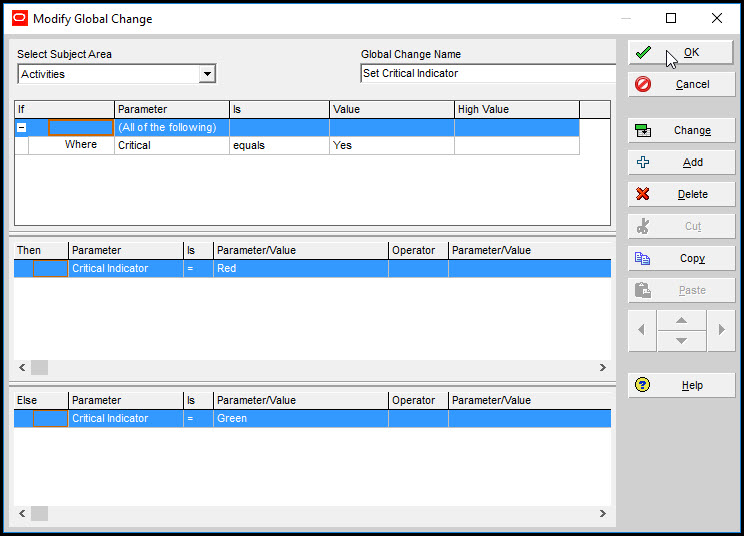 Figure 3
Finally, we insert our Critical Indicator UDF as a column in our activities table. When we run the Set Critical Indicator global change routine, we can see the Critical Indicator list displayed in our schedule, as shown in Figure 4.
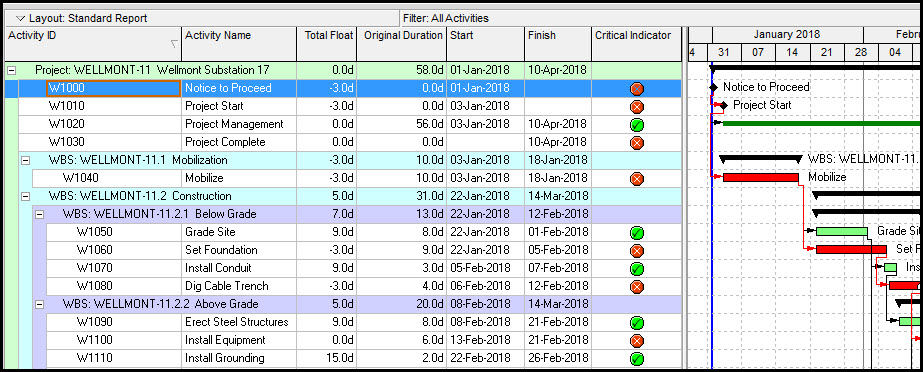 Figure 4
SUMMARY
Creating a Critical Activity Indicator in Primavera P6 is a fairly simple two-step process. First, create the Critical Activity Indicator and then create the global change routine. Primavera P6 will analyze all the activities in your schedule and when the Indicator is inserted in your activities table all any critical or non-critical tasks will be displayed at a glance.
The Critical Indicator is beneficial in monitoring and tracking tasks, alerting you to any delays that may occur in your schedule.
No comments:
Post a Comment